Showing posts with label DIY. Show all posts

Monday, November 2, 2015

Half Skull Makeup | Halloween 2015

This Halloween G and I decided to do a half skull makeup look as our costume. I practiced once on him before doing it and twice on myself, mostly because I wasn't sure how the products I bought would work. We got tons of compliments (much to my surprise) so I wanted to briefly show you some pictures (sorry they aren't the best) and let you know how I achieved the look. Next year I'll do an in-depth tutorial on how to recreate the makeup! (Excuse G's red eye ball, he's an eye liner rookie)


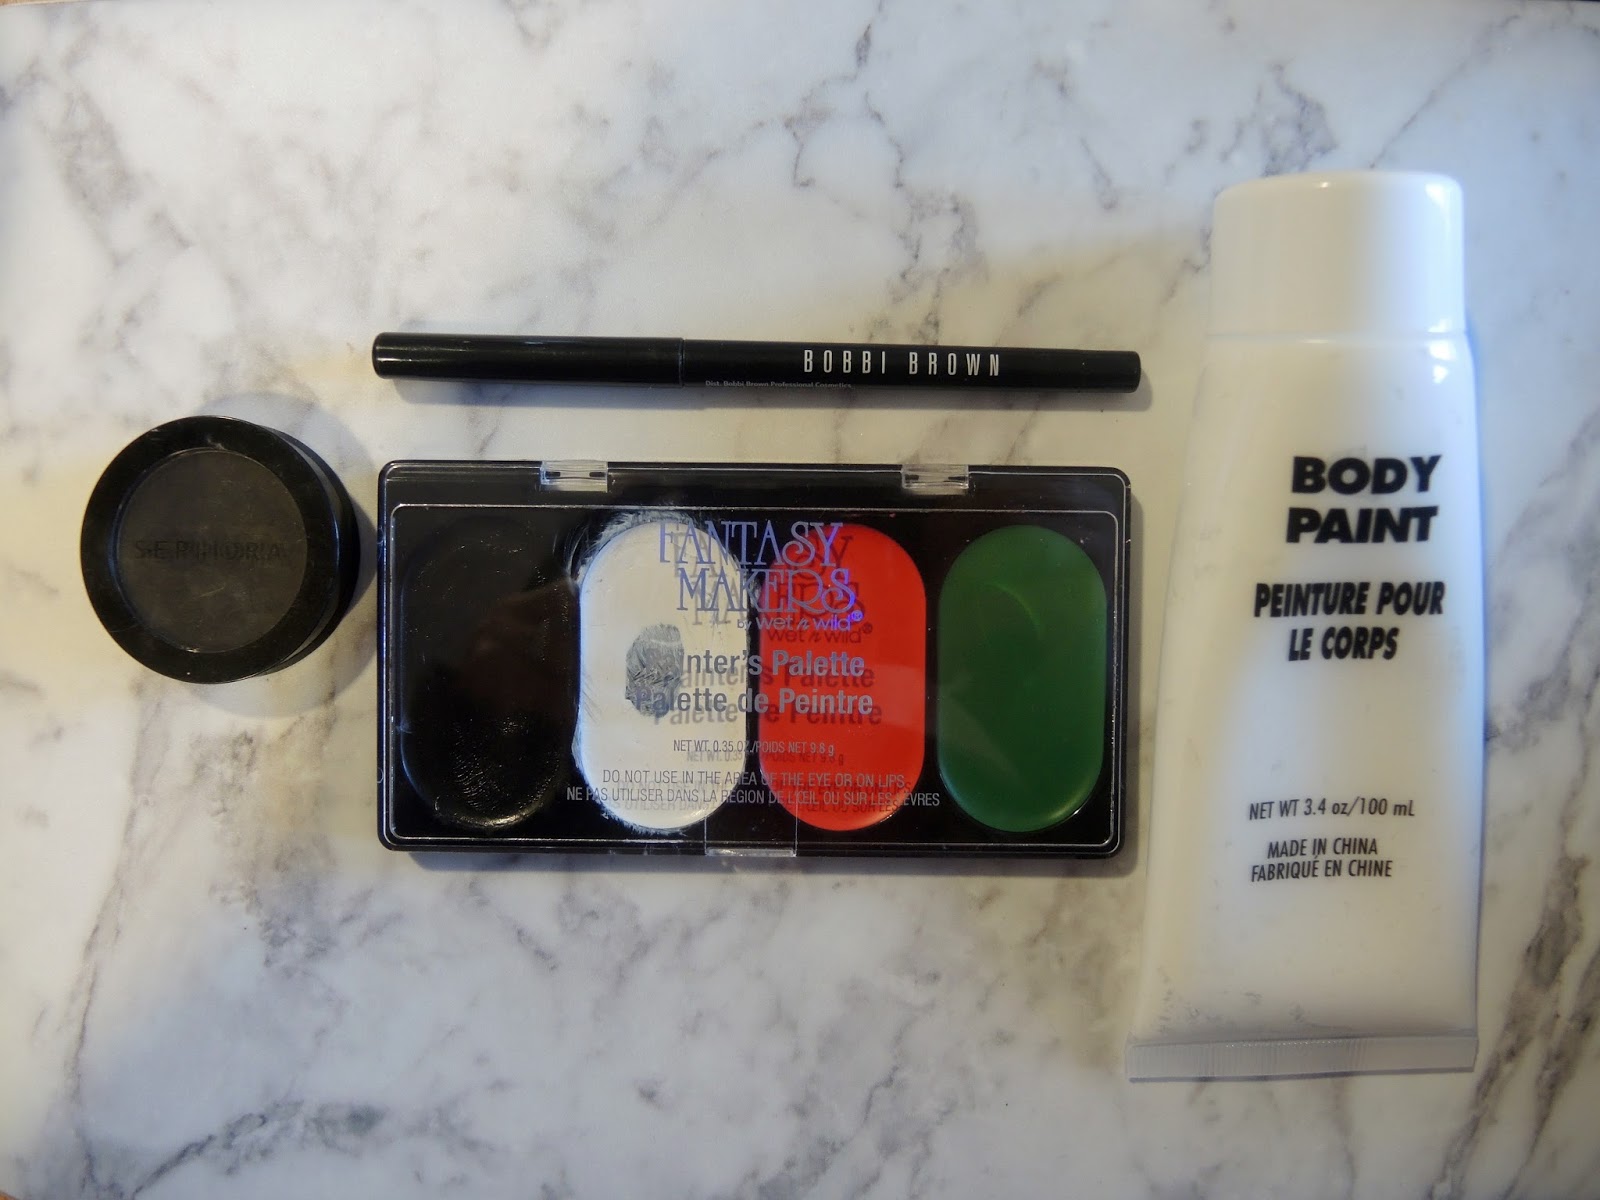
Products Used:

1. White Face Paint
2. Wet & Wild Halloween palette (no online link, any black grease/cream makeup would work)
3. Nars Larger Than Life Eye Liner in Via Veneto
4. Sephora Black Eye Shadow
5. Urban Decay All Nighter Setting Spray


I started by putting a thin layer of white face paint on half of his face and drying it with a blow dryer on the cool setting. I then did another thin layer, thin being the key word here, and dried it again. 
After that I sketched out all of the black areas; I created the lines for his teeth, his nose, and his eye. 

The teeth are definitely the most important part and bring the whole face to life. I started by creating even lines above and below his lips and then slowly started to curve the sides inwards to replicate the body of the tooth. I would definitely recommend curving the bottom to create a more realistic tooth if you have the time to put in some extra detail. I filled in the little 'V' shaped I had created by curving the lines and slightly smudged them with my finger, using black eye shadow as needed.

For the nose, all I did was map out half a tear shape and fill it in with the black Wet & Wild creme makeup. I did the same for the eye, except right under it I used black eye liner. I set all of the solid black areas with black eye shadow to prevent creasing. I used the Sephora brand eye shadow, but any black shadow you have lying around would do.

Once I finished the solid areas, I moved on to recreating the jaw bone that connects to the teeth. This part was really easy. All I did was create a reversed 'C' to appear as if the teeth were sitting inside of the jaw bone structure. I then colored in the back portion of the reverse 'C' closest to the temple, with the cream makeup and faded it to the teeth (setting the solid part first) with black eye shadow.

I created shadows on the forehead and temple area using a small liner brush and eye shadow, blending it out with a fluffy brush and a tiny bit of additional eye shadow. I used the same technique to create little shadows around the nose, under the the eye, and around the jaw.

Once I was done, I sprayed a bunch of setting spray on the painted half of G's face (I had Urban Decay, but whatever you had would be fine) and used the blow dryer, again on the cool setting, and 
on low, to dry everything one last time!

If you recreate this look, make sure to tag me in it so I can see!
I hope this was helpful and not too confusing :D


 photo sig_zpsaeb0a1e9.png

Wednesday, October 28, 2015

5 Last Minute Costume Ideas | Halloween 2015


Bubble Bath - All you need for this are white clothes, some balloons, and a rubber ducky. If you want to go the extra mile, add a hair towel and a loofa as a prop, or even make one of your friends dress up like a shower poof!

Deer - All you have to really do for this is find some twigs and hot glue them to a head band. Wear anything brown or tan, and have fun with the makeup! If you aren't that comfortable with makeup, you can find hundreds of tutorials online!

Skeleton - Wear all black and paint your face. This is my favorite because it doesn't need to be neat. Skeletons are naturally imperfect so you don't need to worry about being a pro.

Rosie the Riveter -  This costume is easy, and makes a political statement. All you need is a jean button down shirt, a red bandana, and some fierce guns (not the kind with bullets :D).

Risky Business - It doesn't get easier than this costume. Although it may not be ideal for all climates, all you need to do is borrow a friends white button down, throw on some socks, black shorts, and sunglasses and you're good to go.

 photo sig_zpsaeb0a1e9.png

Wednesday, July 2, 2014

4th of July | Quick Manicure


For holidays like the 4th of July, I prefer to do my own manicure, because I don't necessarily want to keep my nails painted that way for more than a few days. I decided to do a super quick and easy mini tutorial for all of you who feel the same way!

I went with red, white, blue and gold, and decided to add some glitter to make it fun. At first I attempted to do stars, but it became way too complicated so I opted out of them.

Step 1: Start out with freshly cleaned nails
Step 2: Use any base coat, I used Sally Hansen's 'Hard as Nails'
Step 3: Decide what color pattern you want, there is no 'right order'
Step 4: Paint each nail with one coat of your selected color
Step 5: Let your nails dry a bit before applying the second coat of color (this will prevent them from taking forever to dry at the end)
Step 6: This is of course optional, but for my white nail and one of my red nails, I decided to add some glitter for that extra pizzaz (any craft glitter will work)
Step 7: If you do add glitter, just sprinkle it on to the nail, dusting off any excess
Step 8: Follow with a clear top coat (I used Seche Vite), and you're good to go!

Products Used:
Sally Hansen 'Hard as Nails'
Seche Vite fast drying top coat
OPI 'Big Apple Red'
OPI 'Lights of Emerald City'
Essie 'Blanc'
Essie 'Strut your Stuff'
Essie 'Good as Gold'
Craft Glitter in White & Cherry


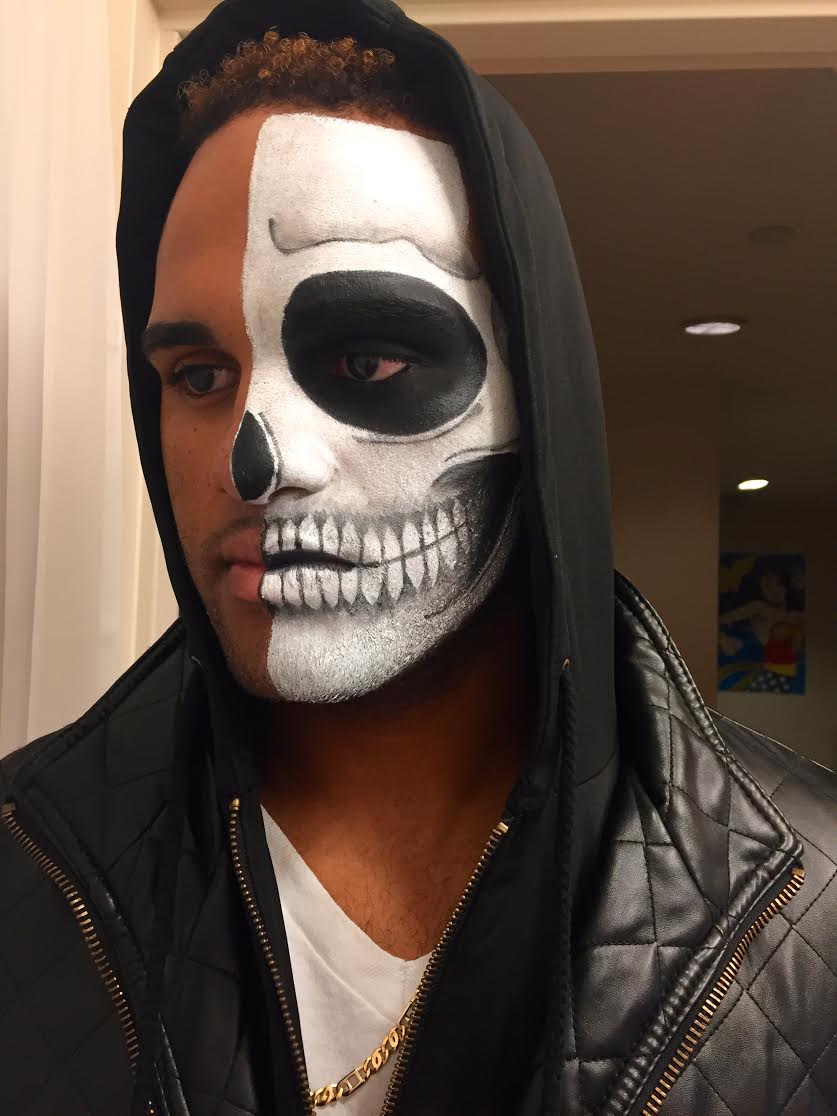
 photo sig_zpsaeb0a1e9.png

Monday, March 17, 2014

Beauty DIY | Hair Mask & Deep Conditioner

Hair masks and deep conditioners are a great way to bring the spa home to you. And everyone knows no one loves beauty you can DIY more than yours truly! Here are two different recipes I've used that I found on Pinterest. Enjoy!


Hair Mask

Ingredients:
1 Egg
1 Avocado
3 Tablespoon of Olive oil
1 Tablespoon of Honey

Directions:
Blend all the ingredients together until the consistency is fairly smooth. Starting with the ends, massage the mixture into your hair and comb through. Clip hair up and cover with a shower cap to prevent creating a mess. Let your hair sit for 15-20 minutes, and then continue with your normal routine, shampooing and conditioning.

Deep Conditioner

Ingredients:
½ banana
½ avocado
½ cup yogurt
1 teaspoon of melted coconut oil
1 teaspoon of apple cider vinegar

Directions:
Either in a food processor, blender, or with a hand blender mix the ingredients, until everything is combined evenly.  After shampooing, apply mixture to hair and comb through so there is even distribution. Let the mixture sit for about 15 minutes. Rinse, and continue with your regular styling routine.


Friday, February 7, 2014

Beauty DIY | Face Masks

Face masks are one of the best ways to relax and recharge after a long week of work or school. By making them yourself you can easily transform a popular spa treatment into a budget friendly pampering session at home. Below are two of my favorite DIY face masks at the moment- they are both really easy to make and very low maintenance. I found these both on Pinterest, but you can always search online for more fun ways to bring the spa home to you! Enjoy!


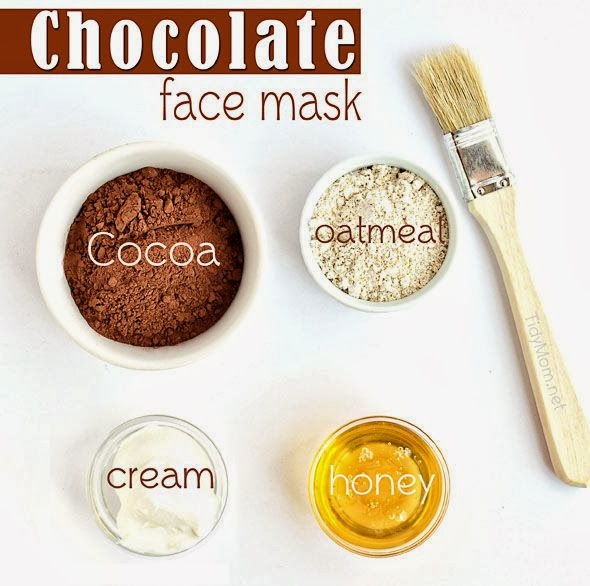
Ingredients:

Organic ingredients are always recommended 

1/3 Cup cocoa
1/4 Cup honey
2 Tablespoons heavy cream, or sour cream
3 Tablespoons oatmeal powder

Note: If you don't have oatmeal powder, you can use Old Fashioned Oats and pulse them in a food processor until they become powdery.

Directions:

  1. Using a small bowl and either a spoon or spatula, mix together all the ingredients 
  2. Continue to stir until all the ingredients are well combined
  3. Apply immediately on face using a clean brush or fingers (cosmetic fan brush can be used or a soft bristled basting brush)
  4. Gently massage the mixture into your skin for about 1-2 minutes
  5. Let mixture sit for 15-20 minutes
  6. Rinse off with warm water
  7. Pat dry skin & moisturize as usual

This face mask can not be made ahead and stored, so only mix it when you're ready to use it.


Ingredients:

Organic ingredients are always recommended 

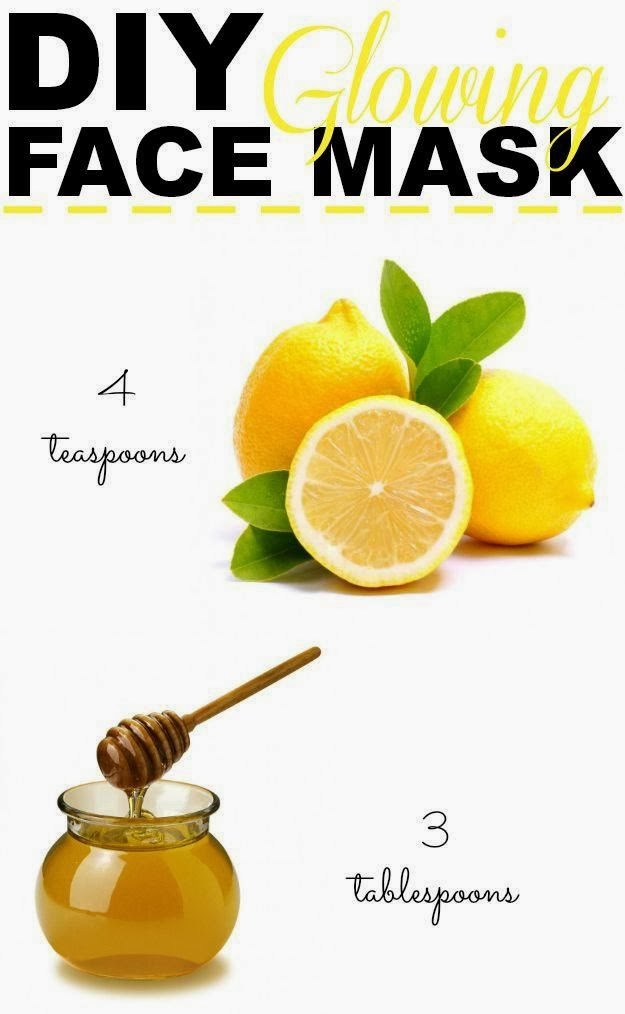
4 Teaspoons of Lemon Juice
3 Tablespoons of Honey 

Directions:

  1. Mix the 4 teaspoons of lemon juice with the 3 tablespoons of honey
  2. Gently apply the mixture to your face, using small circular motions
  3. Let mixture sit for 15-20 minutes
  4. Rise off with warm water
  5. Pat dry skin & moisturize as usual

This mask can be used 1 to 2 times a week to create and maintain a glowing complexion.