skip to main |
skip to sidebar
Half Skull Makeup | Halloween 2015
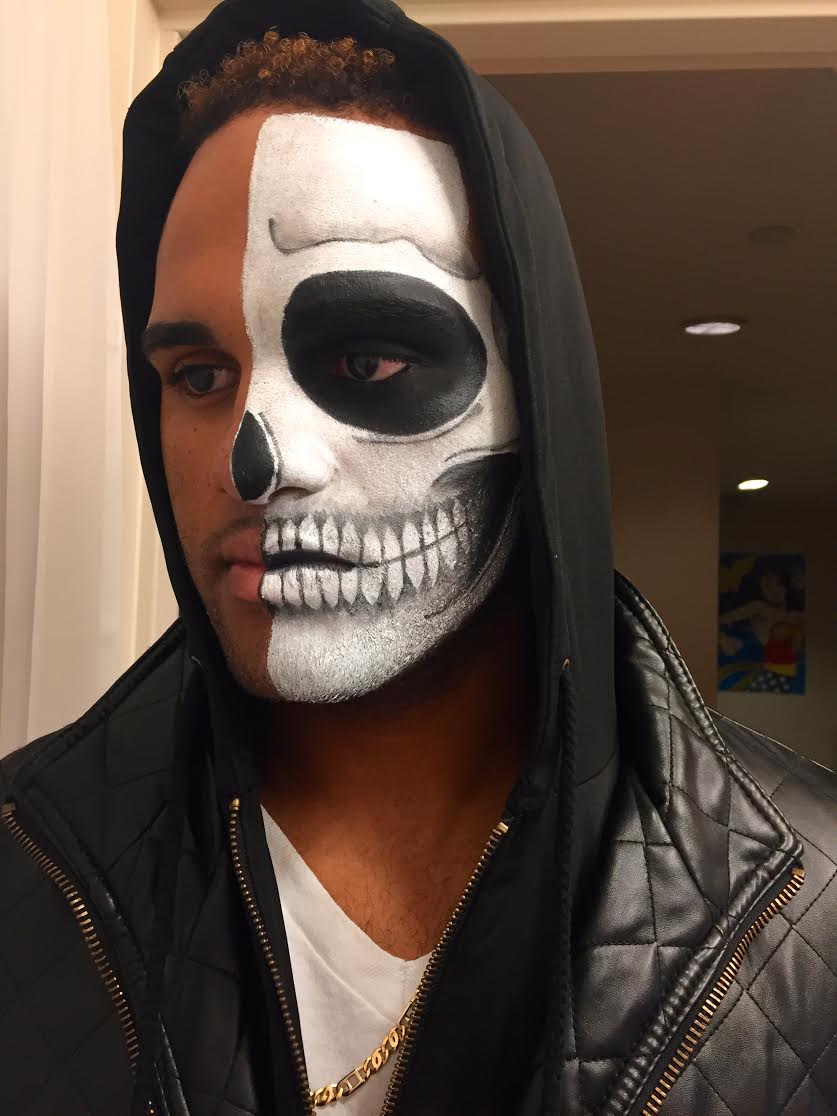
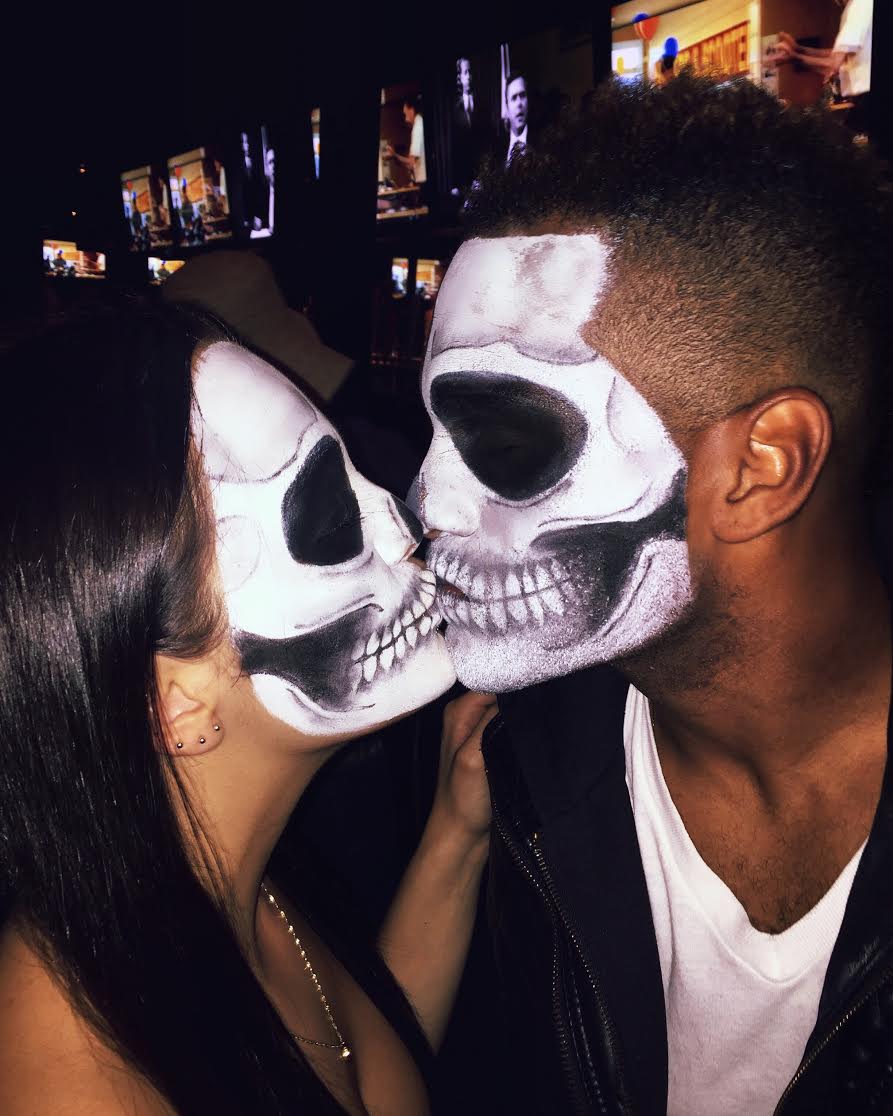
This Halloween G and I decided to do a half skull makeup look as our costume. I practiced once on him before doing it and twice on myself, mostly because I wasn't sure how the products I bought would work. We got tons of compliments (much to my surprise) so I wanted to briefly show you some pictures (sorry they aren't the best) and let you know how I achieved the look. Next year I'll do an in-depth tutorial on how to recreate the makeup! (Excuse G's red eye ball, he's an eye liner rookie)
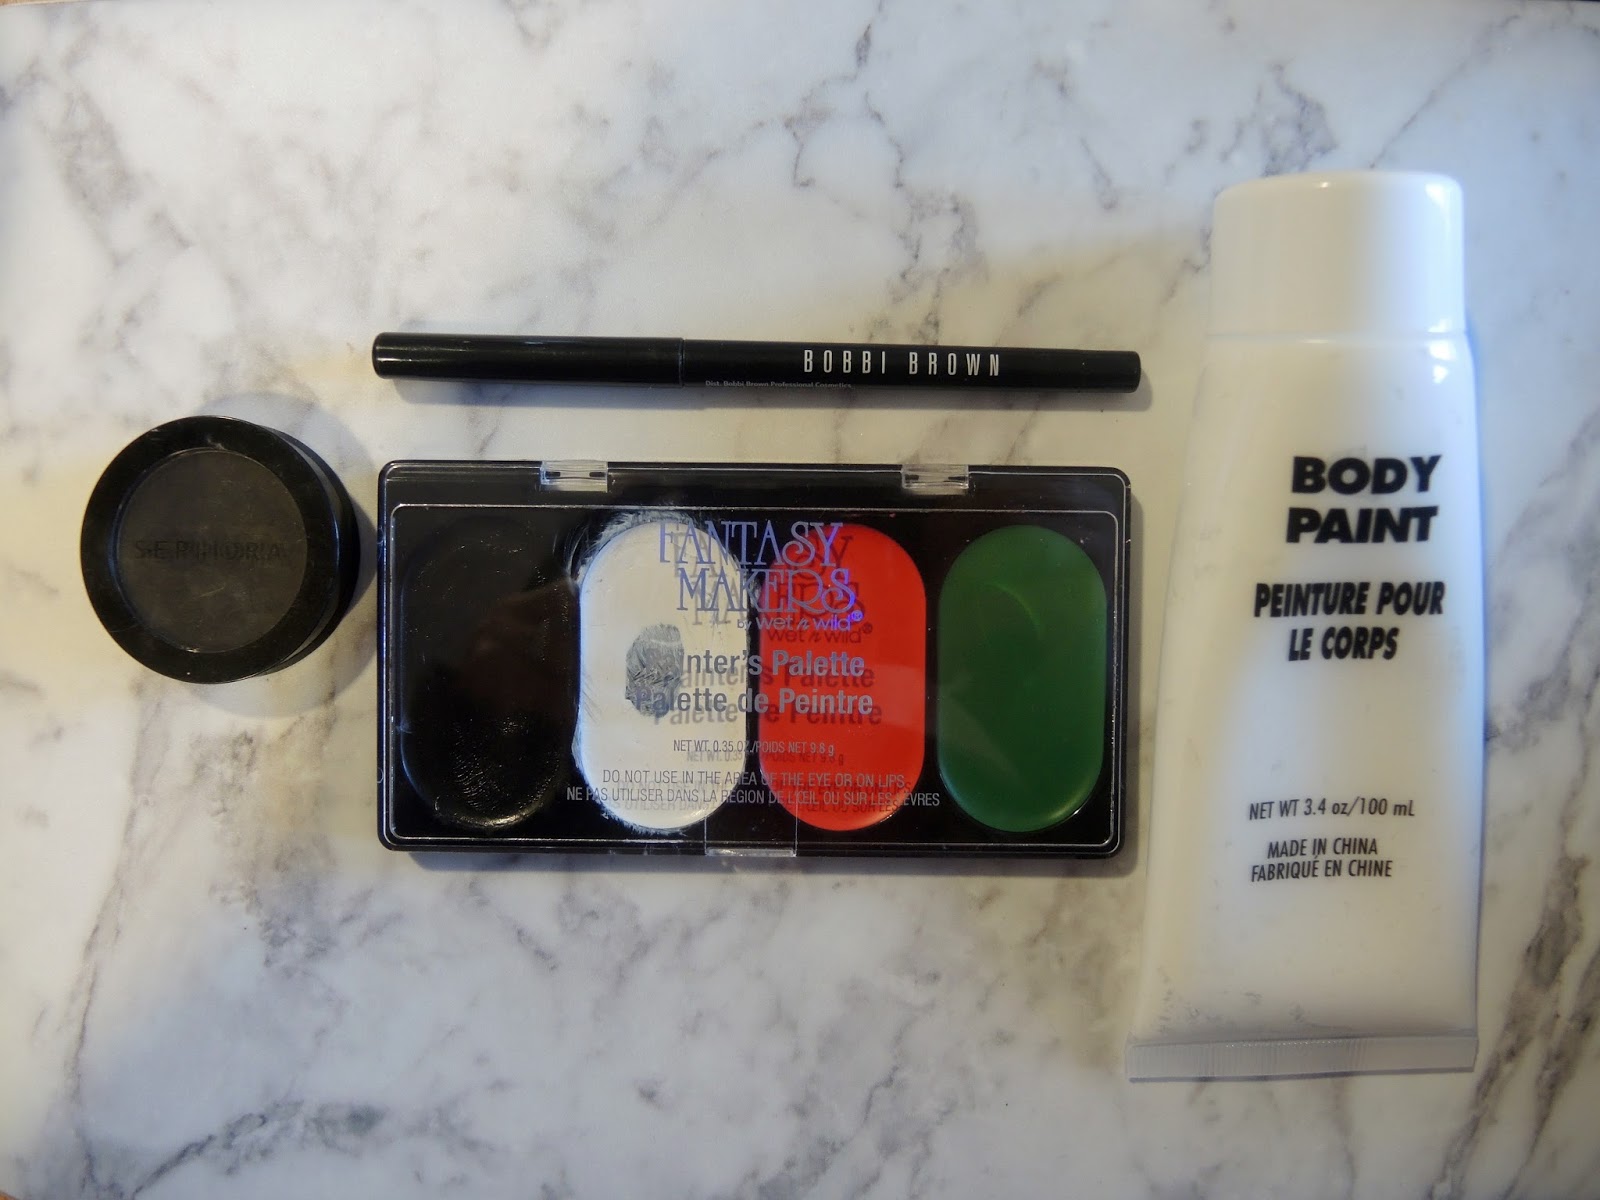
Products Used:
1. White Face Paint
2. Wet & Wild Halloween palette (no online link, any black grease/cream makeup would work)
3. Nars Larger Than Life Eye Liner in Via Veneto
4. Sephora Black Eye Shadow
5. Urban Decay All Nighter Setting Spray
I started by putting a thin layer of white face paint on half of his face and drying it with a blow dryer on the cool setting. I then did another thin layer, thin being the key word here, and dried it again.
After that I sketched out all of the black areas; I created the lines for his teeth, his nose, and his eye.
The teeth are definitely the most important part and bring the whole face to life. I started by creating even lines above and below his lips and then slowly started to curve the sides inwards to replicate the body of the tooth. I would definitely recommend curving the bottom to create a more realistic tooth if you have the time to put in some extra detail. I filled in the little 'V' shaped I had created by curving the lines and slightly smudged them with my finger, using black eye shadow as needed.
For the nose, all I did was map out half a tear shape and fill it in with the black Wet & Wild creme makeup. I did the same for the eye, except right under it I used black eye liner. I set all of the solid black areas with black eye shadow to prevent creasing. I used the Sephora brand eye shadow, but any black shadow you have lying around would do.
Once I finished the solid areas, I moved on to recreating the jaw bone that connects to the teeth. This part was really easy. All I did was create a reversed 'C' to appear as if the teeth were sitting inside of the jaw bone structure. I then colored in the back portion of the reverse 'C' closest to the temple, with the cream makeup and faded it to the teeth (setting the solid part first) with black eye shadow.
I created shadows on the forehead and temple area using a small liner brush and eye shadow, blending it out with a fluffy brush and a tiny bit of additional eye shadow. I used the same technique to create little shadows around the nose, under the the eye, and around the jaw.
Once I was done, I sprayed a bunch of setting spray on the painted half of G's face (I had Urban Decay, but whatever you had would be fine) and used the blow dryer, again on the cool setting, and
on low, to dry everything one last time!
If you recreate this look, make sure to tag me in it so I can see!
I hope this was helpful and not too confusing 


No comments:
Post a Comment